SAP PO / PI 7.5 SYSTEM INSTALLATION PART2
SAP PO Installation:
In this blog , We have explained the how to install Database Instance for SAP PO Installation.
Please check below Blogs for previous installation steps
Part1: How to download the stack xml file for SAP PO Installation.
Part11: How to install SCS Instance for SAP PO Installation.
We will continue below steps for further process.
Part2: How to install Database Instance for SAP PO Installation.
Part3:How to install PAS & Primary Application server for SAP PO installation.
Recall Previous Blog steps:
- Pre-requisites for sap po pi installation
- VM creation for sap installation.
- File system creation and mount points.
- Lunch SWPM and run the installation.
- Installation for SCS instance for SAP PO/PI system installation.

Database installation through SWPM:
- Login database host server through root user.
- Create the directories and mounts for Database.
- Share the /sapmnt and others directory for all hosts.
- Mounts and FS is everything is fine, then lunch SWPM.
- Start the ./sapinst command through root user.
- Command: ./sapinst
- Copy url and paste in browser.
- Login with root user and password for further db installation.
- You can navigate the below path for SAP DB installation.
–> SAP NetWeaver 7.5
–> Oracle
–> Installation
–> Optional Standalone Units
–> Process Orchestration
–> Distributed System
–> Database Instance
As per navigation, Please select the path.
Screenshot for navigation: - Once selected then click next for sap db installation.
- Next screen two option is there 1. typical 2. custom
- If we say Typical in the next screen SAP will pick the default setting. But we would like to use Custom in my landscape, so select Custom and click on Next.
- Select the SAP JVM files path for further installation process.
- Mention the profile directory path and click next.
- Mention master password for allusers. It will effect on all users. If required you can update the password separately.
- Specify the sidadm user password. user id and login shell in the below screen else it will give you by default the master password:
- Specify the type of the installation for Database. Many installation option is there for DB installation.
- • single instance on Filesystem.
• single instance on shared oracle Home.
• single instance on oracle ASM.
• RAC on Filesystem.
• RAC on Oracle ASM. - As per requirement we have selected the single instance on File system
- Mention the Type of RAC and Database host details.
- Specify the Java components folder path for installation
- Specify the kernel and DBTOOLS folder path for installation.
- Specify the SAPHOSTAGENT media path for installation.
- you want to change sapadm pwd change then update the password. Else press next so that it takes the same master password
- Mention Database server and client version details.
- Mention oracle OS user details.
- Mention database administartor user password.
- Mention the Java schema and Confirm the password details.
- java schema: SAPSR3DB
- Multi tenant database option is available. If you want you can select or select No
- Mention oracle listener details Listener port: 1513 Domain :
- Mention oracle client software media path location.
- Mention oracle user password details and confirm. Once updated then click next. Users: SYS & SYSTEM
- Check the Review parameter. If everything is fine then click next for DB installation.
- DB Installation is running, As per screen need to run manual activities.
- As per above screenshots, need to run above command in OS level.
• Login in orasid used
• Set Display variable
• Goto the above mention location
• Run ./RUNINSTALLER command
- Once above task is completed then execute the SWPM.
- Db Installation is running.
- Oracle Database has been installed successfully.
- Screenshot for sap oracle DB installation.
- Database has been installed and click ok then exist.
- Screenshot:
- Installation 100% has been completed.
- SAP ORACLE Database installation is completed apart of SAP PO.

Concussion:
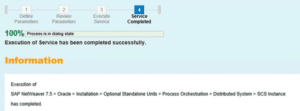
We have successfully installed SCS instance and Database on different hosts.
Please check next document for further installation process.
Part1: How to download the stack xml file for SAP PO Installation
Part1: How to install SCS Instance for SAP PO Installation
Part2: How to install Database Instance for SAP PO Installation.
Part3:How to install PAS & Primary Application server for SAP PO installation.
Part3:Post installation for SAP PO system– please check next blog.


